Dashboard Widgets are very similar to JavaScript Applets, but they sit on The Mac Dashboard. Select File / Export /OS X Dashboard Widgets.
Fill out the details in the OS X Dashboard Widget Generator dialog.
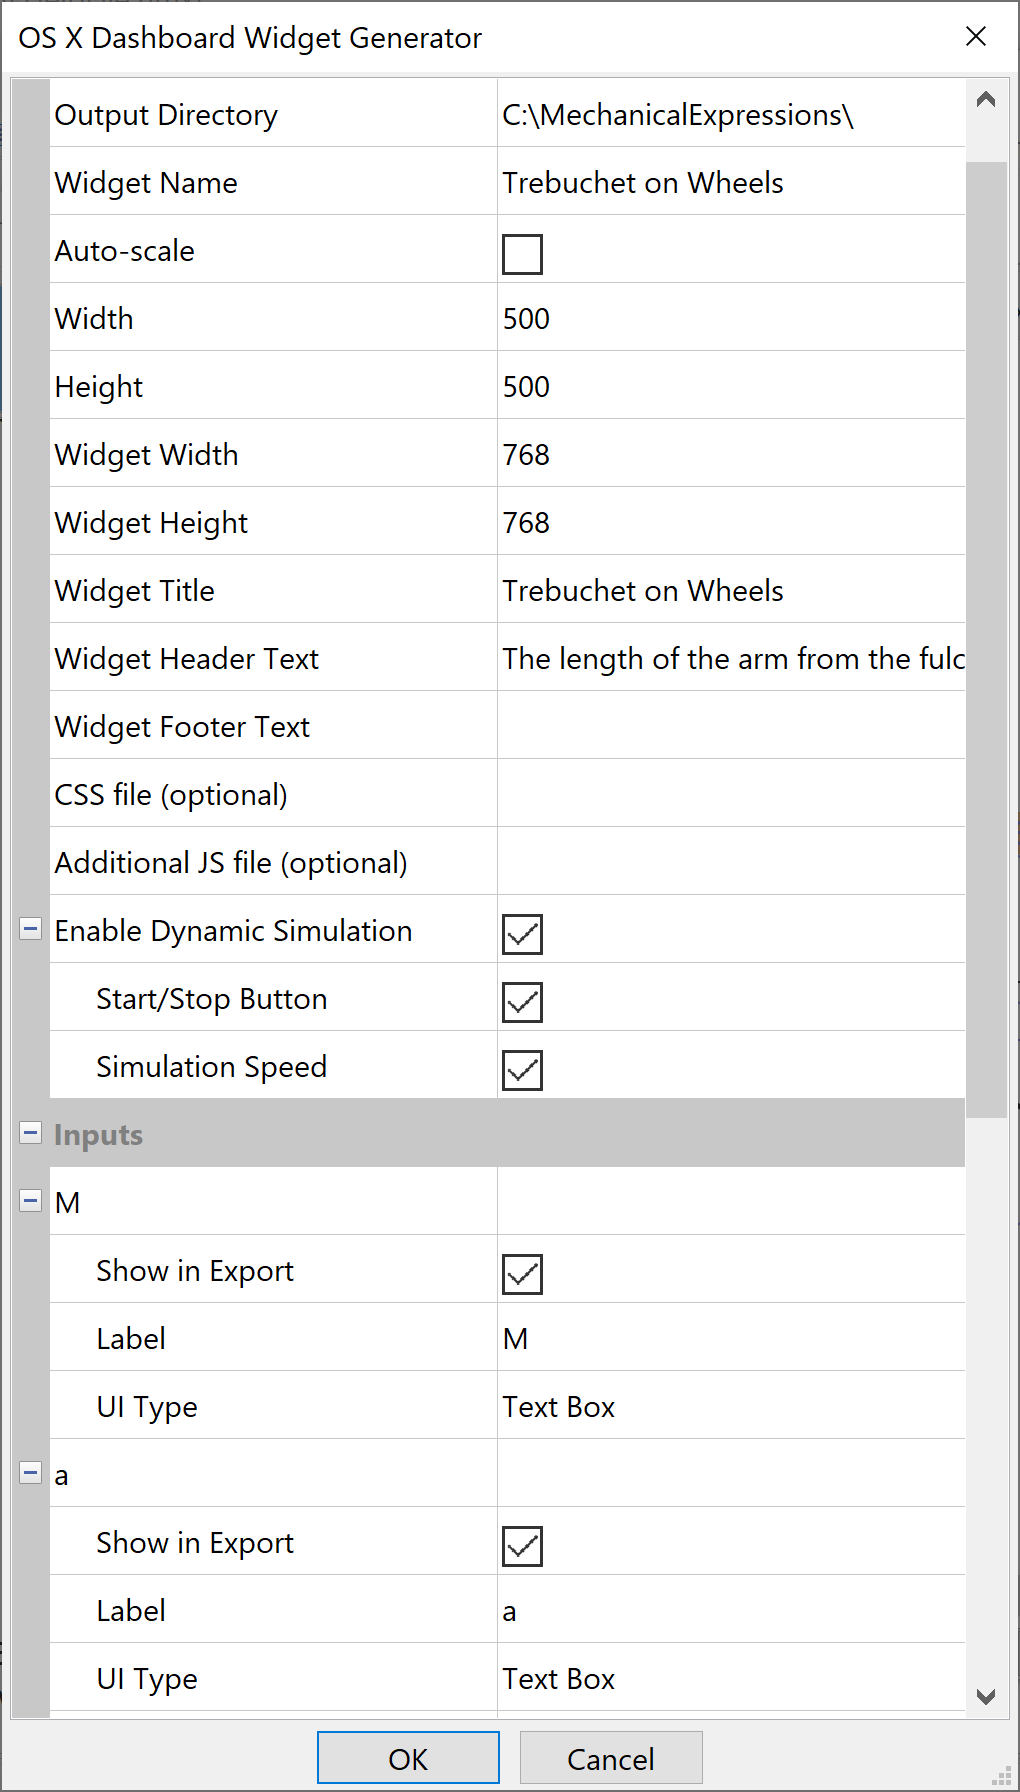
Output directory - tells MX where to put the files. It will create a folder: name.wdgt containing all the components of the widget.
Widget Name - is the name of the folder and the main .html file.
Auto-scale - when check, the Widget automatically rescales the drawing when the user changes the value of one of the inputs; when uncheck, you click-and-drag a rectangle around the drawing after you click Ok.
Width and Height specify the size of the drawing in the Widget box.
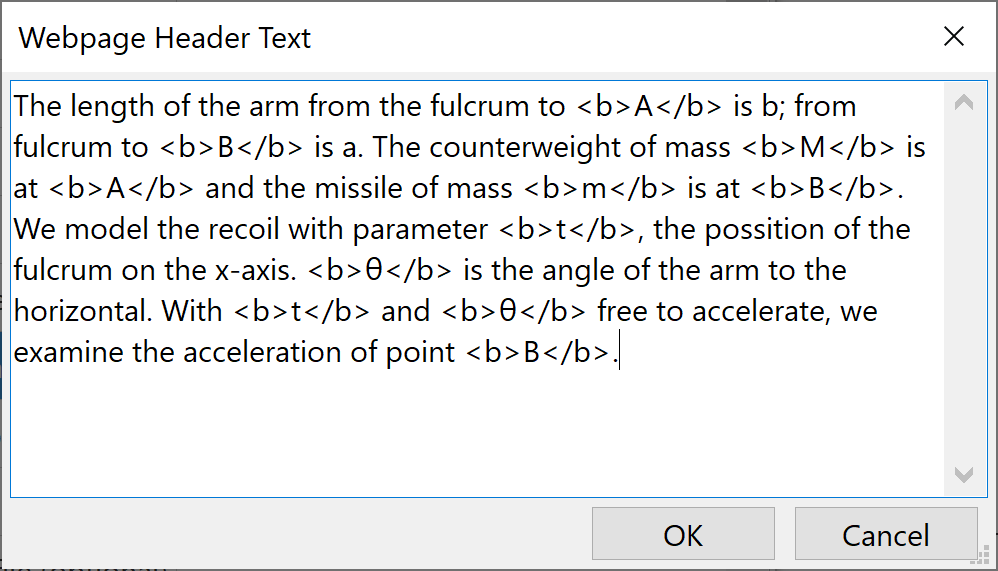
Widget Title, Widget Header Text, and Widget Footer Text - enter your text for these sections.
Since header and footer text may be several lines long, You can go back and change these text boxes before you close the dialog:
- select the text entry box
- click the
 to display the dialog
 - enter or edit text, then click Ok.
Note: you can insert html code into the header and footer text, e.g. to make a word in the footer text bold:
CSS file (optional) - you can attach your favorite Cascading Style Sheet, without having to reproduce it every time.
Inputs - lets you choose which variables the user will be able to change, what text Label identifies the variable and what type of control to use.
Any variables in your MX model may be selected as input variables in the Widget. See the topic detailing UI Types.
Outputs - lets you choose which outputs will appear in the applet, and their text Label.
Any measurements which are present in the Mechanical Expressions model may be chosen as outputs for the widget.