Select File / Export / [HTML5 / JavaScript App] - to export a Mechanical Expressionsmodel as a JavaScript application (.html file), within an html page. This can then run within any web browser that supports HTML 5.
Fill out the details in the JavaScript Applet Generator dialog.
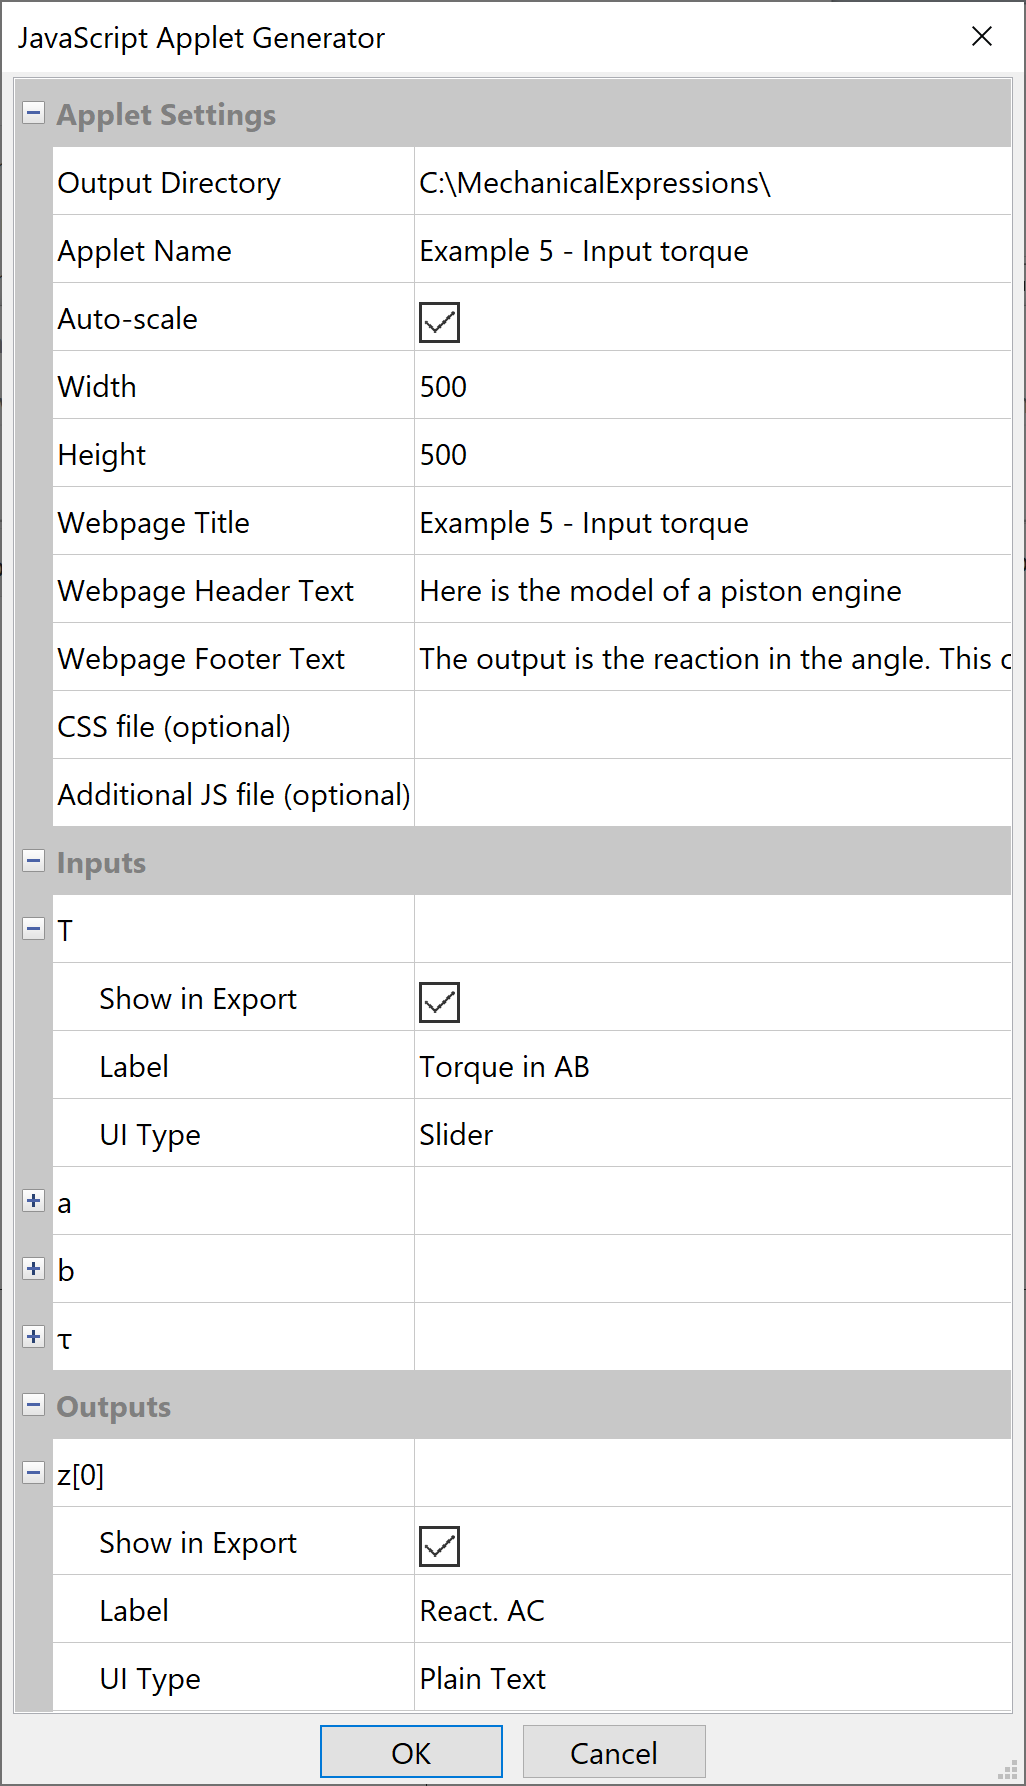
Output directory - tells MX where to put the files. It will create a file: name.html in the specified directory. You should be able to bring name.html up in a browser to see the applet.
Applet Name - is the name of the html file.
Auto-scale - when check, the JavaScript applet automatically rescales the drawing when the user changes the value of one of the inputs; when uncheck, you click-and-drag a rectangle around the drawing after you click Ok.
Width and Height specify the size of the drawing on the html page.
Webpage Title, Webpage Header Text, and Webpage Footer Text - enter your text for these sections of the applet.
Since header and footer text may be several lines long, You can go back and change these text boxes before you close the dialog:
- select the text entry box
- click the
 to display the dialog
 - enter or edit text, then click Ok.
Note: you can insert html code into the header and footer text, e.g. to make a word in the footer text bold:

CSS file - lets you add special formatting to your app with your own Cascading Style Sheet.
Enable Dynamic Simulation - view models with constraints that are free to move, like a pendulum or a trebuchet. You can insert UI to start and stop the simulation and set the simulation speed by checking the desired boxes. If you leave them blank, the simulation starts automatically and the speed is set by the system.
Inputs - lets you choose which variables the user will be able to change, what text Label identifies variable and what type of control to use.
Any variables in your MX model may be selected as input variables in the JavaScript model. See the topic detailing UI Types.
Outputs - lets you choose which outputs will appear in the applet, and their text Label.
See the examples.